Blueberries!
This piece was inspired by a photograph, blown up of blueberries - but for something different, I used metal to make them out of!

I started by making a background to mount the piece onto. Using a multi-layered base of
Pelmet Vilene + upholstery fabric + painted
Wonder Under + fused and melted chiffon scarves, I free machine embroidered across the entire surface in a controlled pattern.
I then fused on some Metallic Foils in two shades of blues and a purple, which came out
really bright so I heated them with a craft heat gun to dampen their effect. Then, onto the metal.
Using
ArtEmboss Colored Foil in green (a 3-mil aluminum sheet that is soft enough to emboss into) I traced the blueberries from the photograph and added textural details. I then heated the metal with a miniature blow torch to change the colour of it from green to blue. It was then painted with a black acrylic and when partially dried, rubbed to remove most of the colour but keeping enough to highlight the detailing. Working quickly while the paint was still damp, I sprinkled embossing powders to be embed into itself. Heating these with a heat gun added more layers to the colours.

The metal was then free machine stitched onto a piece of acrylic felt and cut out. Here is a detail:

Looking through my yarns to add a little more colour, I found this one that I wrapped around black pipe cleaners and then machine stitched as an outer border onto the background piece.

Then it was layout and adding 'interest' pieces.
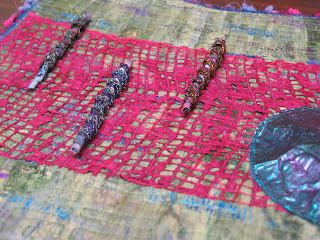
Going through my various stashes, I found a piece of mesh that had been dipped into a paper slurry with the paper drying onto the crossbars. This brilliant magenta matched the border yarns so perfectly that I
had to use it!

I made some fabric beads out of hand dyed cotton bits and stitched felt that had been zapped by a heat gun; and a small tile made out of Friendly Plastic.
When I stitched the metal down onto the background I formed it into a 3D shape by stuffing it with quilt batting - this gave some dimension to the piece.

Here is the final creation before it was framed in a simple black frame on a white matte board. I am pleased with the end product and how it all ties together.


